Ghost Hunting 101

2007 - Frauds,Scams, Hoaxes and Fakes - 2007

Home
S
.
P
.
E
.
C
.
T
.
E
.
R
.
.

Since the 1880's and the Start of the Spiritualist Movement ,
 
There Have Always Been Scams, Frauds, Fakes and Hoaxers! 

BEWARNED......BY POSTING FALSE EVIDENCE
fakes_and_frauds2.jpg
WE WILL FIND YOU!

Although some groups/people actually believe that by doing these types of trickeries or enhancements will make people more aware of qhosts/spirits. Unfortunately it actually gives the skeptics more negative amunition to throw at the paranormal community at large and
the serious paranormal investigators/groups.
 
I GIVE EVERYONE, UNLUCKY ENOUGH TO GET TO THIS PAGE,
THE OPPORTUNITY TO "PROVE THEIR EVIDENCE IS REAL" AND
 WILL WORK WITH THEM TO DISCLAIM WHAT I HAVE POSTED....
 
AT THIS TIME THESE ISSUES ARE THE UNDER SCRUTINTY:

We Support!
paranormal_poetic_license.jpg
You Can Also!

.

DEBUNKED by S.P.E.C.T.E.R.  - TILL PROVEN OTHERWISE:

New April 1st, 2007 - This is new research and no hoax or fraud has committed but needs more looking into.

face.jpg

This is the original photo submitted with the claim by P.I.T Paranormal Investigations that they have discovered how to photograph spirits using crystal energies......
 
I was given the photo's and his comments to use on this site with his permission....
 
Bruce's Statement:
 
“I have stumbled upon a new form of itc that I cal visual projection imaging or VPI for short. I came upon it after noticing that the afternoon sun shining through a crystal window in my
home projected onto the walls and surrounding objects and I noticed a slight movement of part of the reflection and after closer scrutiny I noticed if resembled a face. I got my digital camera and snapped a few pics after loading them onto the computer and adjusting the brightness and contrast to cut the sun glare this is what I found and have been capturing better and sharper images since. I have experimented with crystal itc in the past with moderate results thats when you shine a light through a quartz crystal and take pics of the crystal the spirits actualy use the natural energy of the crystal to form an image inside of the crystal. I believe that VPI is the same premiss only it is projecting through the crystal and onto the walls much like a movie projecter sends light through a film cell and in turn projects it onto a screen. I will try to re create this phenamanon in a controled experiment using a quartz crystal and a full spectrum light source.
 
I am the founder and lead investigator for P.I.T. Paranormal Investigating Team Of south new jersey also do exstensive research with evp and visual itc.”


WHY DOES SPECTER "CLAIM" IT IS A HOAX?

At first he had two versions with the face one way then a second picture within 5 seconds had a different expression?  I asked him if I could see the originals without his enhancements.      I was told he no longer had the originals?  Hmmm....Seemed suspisious?

When he put this one up it looked simuliar to the previous face posting but without a mouth?     I asked if I could use it for my site and took a good look at it.   

Unfortunately I have to debunk his theory and equipment used to capture this entities picture.  

Here is what I found...


How I debunked this photo...
pics_only.jpg

Unfortunately  this file has been destorted in the jpeg format allowable here, it is a little hard to see the cutting marks.   If you move away from the screen you will be able to  see the cut marks used by the lasso tool are darker than the original photo.   The red areas will give you an idea of the shape that was outlined out where the eyes are set.   There where no areas that where dark enough in the posterized version to create eyes or in the original photo and had to be added in at some point.   The picture when blown up pixelates on the grain but not on the eye cut outs.    This is another indication of forgery.    Uneven pixelization.   The addition of key highlights in certain areas is what we call matrixing.
 
 
The technology and photos behind the 
I.T.C. machine at this point are questionable?
 
For some interesting paintings created by
Sandro Del Prete that  include matrixing visit this site:

.

Please Note:  I have spoken with Bruce about this matter and he has agreed in working with S.P.E.C.T.E.R. and prove his technology and enhancement methods are correct.
 
New:   Bruce has sent me an e-mail to his site link section which explains his process.  With my 17 years of experiance as a graphic technician, I have found some errors in his methods and have made some comments in red.

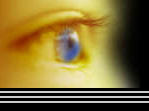
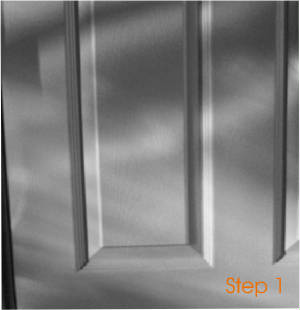
STEP 1.   OPEN THE IMAGE FILE IN PHOTOSHOP CS IN IT'S ORIGINAL FORM
 
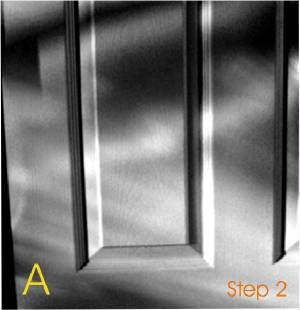
STEP 2.   CHANGE THE IMAGE FROM COLOR TO BLACK AND WHITE USING THE GRADIENT FEATURE AND ADJUST LEVELS OF BLK & WHT WITH THE GRADIENT TOOL
 
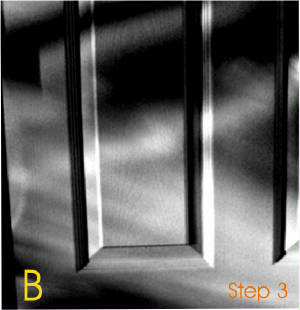
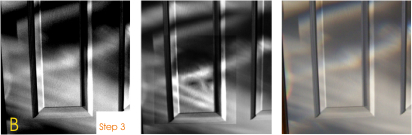
STEP 3.   SELECT THE AREA WERE THE IMAGE IS LOCATED SO AS NOT TO HAVE TO WORK ON THE WHOLE PHOTO THIS LEAVES JUST THE AREA OF CONCERN TO BE WORKED ON
 
STEP 4.   ADJUST BRIGHTNESS AND CONTRAST TO LESSEN GLARE AND START TO BRING OUT SOME DETAIL
 
STEP 5.   USE THE GAUSSIAN BLUR TOOL TO ELIMINATE THE NOISE DOTS FROM THE IMAGE
 
This step is not nessasary as this tool is only used to lesson halftone dots from  a printed image
that is scanned into a computer. 
 
STEP 6.   SOMETIMES NOT ALWAYS I WILL USE THE CURVES TOOL THIS FURTHER ENHANCES THE BLACK AND WHITE AREAS OF THE IMAGE SEPERATLY
 
Why are we enhancing black and white areas?  The image itself has just been enhanced?  This is now becoming manipulation to the original image?
 
STEP 7.   AT THIS STAGE I WILL USE THE BURN TOOL IN A SWEEPING MOTION BACK AND FORTH ACROSS THE IMAGE LIGHTLY TO ENHANCE DARK AREAS OF THE IMAGE WITHOUT DARKENING THE WHOLE IMAGE THIS TOOL ONLY DARKENS EXISTING DARK SPOTS IT DOES NOT CREATE THEM AS WOULD THE PAINT BRUSH TOOL
 
Once again you are using a different tool?  This is not brightning and contrasting.  You are drawing on the image by just enhancing only certain sections.  As mentioned about my use  with the lasso tool.
 
STEP 8.   AT THIS POINT I USE THE DODGE TOOL IT SERVES THE SAME PURPOUSE AS THE BURN TOOL AND I USE IT THE SAME WAY ONLY IT WORKS ON THE LIGHT AREAS AS APPOSED TO THE DARK   Same comment as step 7.
 
STEP 9.   NOW I USE THE SMART SHARPEN FEATURE THIS IS BASICALY SELF EXPLANITORY IT SHARPENS THE IMAGE  Why would you not just sharpen the original desaturated image to bring the face forward?  By sharpening only the areas you have worked in you are adding definition in these section such as the hair, which is not in the original?
 
STEP 10.   HERE I USE THE SELECT TOOL TO SELECT THE IMAGE THAT I WANT TO SAVE AND     DISCARD THE USELESS PORTION OF THE PHOTO  That's fine? But generally, all photo's should be kept at full size, so that viewers can ascertain if something around the area made the image or caused the projection? 
 
STEP 11.   THIS IS THE SIZE AND SHAPE OF THE IMAGE I WILL SAVE
 
STEP 12.   IF NEED BE I WILL SHARPEN THE IMAGE A SECOND TIME  This only adds more definition to the already highlighted/defined  areas?
 
STEP 13.   AT THIS POINT THE IMAGE ENHANCEMENT IS COMPLETE SO I WILL SAVE IT AS A JPG FOR THE WEB

HERE IS THE FINISHED IMAGE THAT WOULD BE POSTED TO THE WEB
 
PLEASE TAKE NOTE THAT AT NO TIME DURING THIS PROCESS DID I CHANGE, ADD OR SUBTRACT ANY FEATURES FROM THE IMAGE AT ALL !    
Actually from step 4 down is changing the image.  You have in your own words "added contrast and brightness to the areas that needed them"?  I see no areas in this photo that needed what you were talking about from viewing the black and white or original coloured photograph.


I have done another test on this photo only using brightness and contrast from the original.   Here are my steps and final results....
 
Step 1. Desaturate make picture into  black and white.
 
Step 2. Contrast and Brightness to get the grey to white and the
darker grey to black as in P.I.T.’s photo
 
Step 3. Final product
 

step1.jpg

First save with contrast at 100%.   Brightness at -3%. This is as far as I could take this image and had to save it.    Copied image A and reset gauges to brighten and contrast again achieving photo B.

Step 2. Only using brightness and contrast,
step_2.jpg

Using image A and adjusting the Contrast to 21%  and Brightness to -11%.  This was all I was allowed to do to get the image close in tonal values of P.I.T.’s original image (by only using brightness and contrast).  I did not increase the intensity settings at all and they remained at zero.

Step A and brightening and contrasting 2nd time.
step_3.jpg
Final Result.

Comparision of photo's side by side:

Specters Final Analysis...Pit's Image...Original
step_5.jpg
Notice my image and door still look the same? Where is the face?

Although you are correct in your statement that "you only
use brightness and contrast".    I do believe from what I have shown here... There is quite a bit of poetic license involved.

Help Stop Paranormal Poetic License!
paranormal_poetic_license.jpg
The Truth is Out There!